


The Camera You Always Carry
Smartphone Photography
What are the key differences compared to system cameras, and what are their specific advantages and disadvantages?
Your Photo Trainer
Johann Dirschl
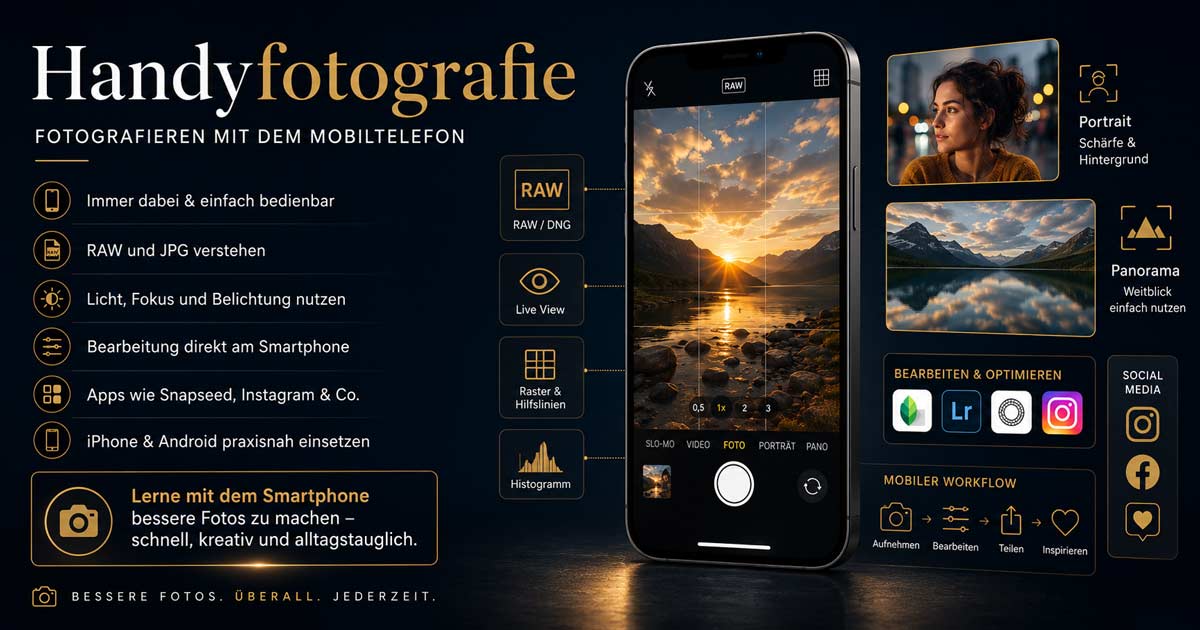
Smartphone Photography
Anyone who closely follows the compact camera market may have noticed that major manufacturers are distancing themselves. The new entry-level class here is DSLR, DSLM, and action cameras. Not without reason, as mobile phones, with their now very good cameras, are increasingly capturing this market.
Anyone who believes they can immediately take better pictures with a consumer DSLR camera is usually mistaken and, upon closer examination of quality, will often prefer the mobile phone for specific applications.
Advantages:
- always on hand
- small and lightweight
- easy operation
- on-device editing possible
- direct connection to email and social media
- numerous apps
- easy stabilization if required
- wireless image transfer
- and much more
Disadvantages:
- Phones with truly good cameras and RAW options are often expensive
- Lacks hardware focusing
- Limited optics
All in all, the mobile phone, as a constant companion, is very capable of perfectly capturing vacation photos, portraits, and even products. In video mode, these devices also shine with truly excellent capabilities.
The RAW function, with which mobile phones from iPhone 6s onwards are equipped, is often largely unused. I will explain the advantages and possibilities of editing to you.
I personally work with an iPhone. However, the programs shown can generally also be used with Android devices. Discover Snapseed, Instagram, and more...
What to bring: Mobile phone, possibly with charging cable
About Me
For many years, I have been offering photography courses primarily aimed at photographers using DSLR, system, and bridge cameras. However, in recent years, another trend towards digital photography with mobile phones, action cams, and VR cameras has also been observed.
I myself am very satisfied with my DSLR equipment, even though, like many others, I have tried working with smaller cameras (Samsung system cameras, Theta S, GoPro, or even a mobile phone). My main goal here is to carry less equipment or achieve a usable result with less effort. But honestly, from a purely photographic perspective, sensor size and a good lens are irreplaceable after all these excursions.
On the other hand, the mobile phone is a constant companion, and many new cameras require a mobile phone to be used at all.
Since early 2017, commercial inquiries for mobile photography have been increasing. Therefore, I have taken on this topic, knowing exactly what photography needs to deliver to satisfy both myself and my clients.
Preparations for the first course left little time, as I wanted to start with the latest technology. As a photographer, I take all my pictures in RAW format and naturally wanted to test this with a mobile phone as well. Therefore, before starting the documentation, I ordered an iPhone X, which I have been using since November 2017. From a camera technology perspective, the main reasons were the two separate lenses and the ability to capture RAW photos.
I work with Apple products for several reasons. However, I would like to note that from a photographic perspective, there are certainly equivalent products in the Android or Windows camps.
Why I Work with Apple
There are often extensive discussions about whether Android or iOS is superior. Based on my background, media professionals have traditionally gravitated towards Apple. Programs like Logic and FinalCut were so technically superior at the time that many readily switched from Windows to Apple. Soon after, users became Apple fans, and Apple understood how to design its operating system to communicate seamlessly with all its devices. Today, it's even possible to program all Apple devices using the same programming language. Being first to market and having a central App Store was admittedly a significant advantage, which is why the developer community is so large today and new products are offered very quickly.
Why Android Also Has Its Advantages
Firstly, it is significantly more affordable. Android was created by Google and is therefore also an excellent technology. Android is an operating system used by many manufacturers such as Samsung, Huawei, LG, etc. Programming is done in Java and is equally straightforward to program. As an operating system, it is versatile in its application and is deployed across thousands of different products. However, updates are naturally more difficult to integrate because devices constantly feature new hardware, and not every new version of Android runs on older hardware. I would therefore boldly claim that Android itself is more versatile and standards-compliant than iOS, but less durable. Manufacturers must test and potentially adapt Android for their devices. Apple has a significant advantage here with its exclusively proprietary devices.Â
Hardware Comparison
If you look at Apple, you certainly get the best technology, but also at a hefty price. If you want the same performance from Windows or Android devices, you quickly realize that other manufacturers are no longer bargains either. Often, the same components are even installed, so from a photographic perspective, you certainly have no disadvantages when using one new smartphone over another.
Market Shift in the Digital Camera Market
Established manufacturers are increasingly focusing on action and 360° cameras, while smartphone manufacturers like Samsung and Apple are increasingly taking over the camera market.Â
Current State of Technology
Fundamentally, one might assume that mobile phone picture quality is constantly improving. And advertising does its part to make us believe that the iPhone and similar devices perform like a large DSLR or DSLM, even in portrait mode. However, a closer look at the technology reveals a little less glamour.
Soberly speaking, a current iPhone with one or two lenses offers 12 megapixels at 28mm or 58mm, along with an aperture of f:1.8 and f:2.8. Lens selection is done with a single tap in the Camera app. Two cameras always offer the advantage of higher quality, as no digital zoom is required.
Questions I Ask as a Photographer
This section is for me only! I have many questions that perhaps a course participant can answer, or I will provide what I have discovered. In fact, there is currently little documentation on how a photographer can transition to mobile photography without significant quality loss.
I will create separate sections for each question, which will then be progressively filled.
Aperture
The aperture controls the amount of incoming light and also how sharp the image is, starting from the focused area. The smaller the aperture opening, the sharper the image becomes, which is particularly important for landscapes and architecture.
When looking at the Camera app or other apps like Lightroom or Camera+, one notices that there are no aperture settings available. After some research, it's clear that all built-in cameras have a fixed aperture:
https://www.macwelt.de/a/iphone-x-im-test-features-preise-verfuegbarkeit,3437684
http://www.areamobile.de/specials/45823-iphone-x-das-kann-die-neue-apple-kamera
https://www.apple.com/de/iphone-x/specs/
Example: iPhone X
Front camera (7 Megapixels)
- 35mm, f:2.2 (between wide-angle and normal focal length)
Rear cameras (12 Megapixels)
- 28mm, f:1.8 (wide-angle)
- 56mm, f:2.4 (normal focal length)
Unfortunately, not all manufacturer specifications are disclosed; I had to determine the focal length of the front lens by comparison, and the 28mm and 56mm seem to correspond to full-frame. However, the manufacturer refers to 56mm as a telephoto lens, which is not entirely accurate.
Without knowing the sensor size and thus the pixel density, a photographer cannot draw any real conclusions. One of the articles mentioned a Huawei with 12 megapixels, which has a pixel size of 1 micrometer. This would result in a sensor size of 4x3mm for 4000x3000px, or Diagonal 0.275591 inches. This is certainly a realistic size. For the iPhone X, I found no specifications, only speculation that it should be 0.5 inches. That would be almost a doubling, which I personally do not believe.
From a photographic perspective, the appearance of an image is primarily determined by the aperture, shutter speed, and focal length. The lack of aperture control therefore presents a significant problem. While the manufacturer offers a second lens for this purpose, the fact that only an f/2.4 aperture is available at 56mm does not compensate for the lack of aperture control.
The missing hardware performance in smartphones is therefore compensated exclusively through software. It's no coincidence that there is a portrait mode, which uses Augmented Reality functions to apply a Gaussian filter to the background in real-time. Unfortunately, the underlying technology is not evident from the advertising promises. In my case, it was a major reason for purchasing the successor device.
Shutter Speed
Shutter speed indicates how long light (photons) reaches the sensor. We already know that the aperture is fixed, so shutter speed is our most important value for creative photography.
If you look at the manufacturer's camera app, you won't find any information on this. The smartphone automatically adjusts this based on the desired brightness. Unfortunately, you cannot see which values are being changed at that moment. The iPhone will decide this automatically depending on the subject. If the smartphone detects faces, it will maintain a minimum shutter speed and tend to increase the ISO value. If it doesn't detect people, it will try to keep the ISO value lower.
For us photographers, this is not satisfactory, so we download an app that allows manual settings. I have tried this with Lightroom and Camera+.
Camera+ shows how the iPhone works with its 12-megapixel sensors here:
1/12000 - 1/12 shots possible without stabilization
1/11 - 1/8 shots possible with image stabilization
1/7 - 1/3 shots only possible with a tripod
the front camera probably has larger pixels and allows max. 1/2 second.
The lower the pixel density, the less light is captured per pixel, making handheld photography more difficult. The front camera therefore also has a lower resolution, as the smartphone is usually held in hand or even on a selfie stick here.
As a photographer, one would expect shutter speeds from 1/8000 seconds up to 30 seconds. This immediately raises more questions:
- why are long exposures not possible?
- why 1/12000, if we can barely capture any light anyway?
I have found that apps like Camera+ take multiple shots for long exposures and then combine them using software. I've already realized the great thing about smartphones: there's an app for almost every problem. With that in mind, I found a page that introduces Slow Shutter Cam. This makes long exposures possible, as well as star trails or ND filter shots. This app can do more than I hoped, and you're welcome to try interval shots etc... Of course, a tripod is required for this, but there's a separate section for that.
https://www.iphone-ticker.de/slow-shutter-cam-langzeitbelichtung-mit-dem-iphone-107591/
It also works with the standard Photo App, but Slow Shutter Cam is simply more fun and only costs 2.99 EUR.
In the iPhone's Camera app, you can activate LIVE Photo. This allows the iPhone to capture images before and after you press the shutter. On this series of images, you can swipe up and then choose various effects, including long exposure. The disadvantage is that it always captures 3 seconds, which severely limits creative exposure.
ISO
The ASA value previously indicated the light sensitivity of the loaded film. In digital photography, this value was renamed to ISO and is typically used in the range of ISO 100 to 1600Â on standard cameras. Higher ISO values are also perfectly usable with very high-quality cameras.
Since the iPhone's camera app does not allow PRO / manual settings, we cannot precisely determine which values the camera uses; therefore, I consult Camera+ again here.
ISO 25 to 2500 is available here.
The same applies to Lightroom. Why such a high low ISO is available here made me think and Google. I found a very helpful article:
http://snapsnapsnap.photos/a-beginners-guide-for-manual-controls-in-iphone-photography-iso/
Although the article is in English, it beautifully explains that different limits apply here. However, ISO 25 delivers the best image. This is likely due to the smaller sensor and much smaller pixels. Since we cannot select this in the manufacturer's camera app, this article also recommends using Camera+. Alternatively, Lightroom is also an option.
If you do not have the option to use ISO 25, there is also a workflow using Photoshop or Affinity Photo that removes noise. I have documented the process here:
AF and MF: Automatic vs. Manual Focus
Automatic and manual focusing is possible with any camera.
In the default iOS Camera app, this doesn't seem possible at first glance, but simply tapping the desired focus point on the display will bring the lens into focus. This can be repeated as often as needed, and you can also correct the exposure immediately with an up/down swipe.
But what if you want to lock the focus and exposure? Then you hold your finger on the screen for 2 seconds, and both focus and exposure are locked. This is particularly useful when, for example, you want to create a manual panorama.
True manual focusing is then only possible again in external apps like Lightroom, but then also with focus peaking.
Light Metering
A proper camera usually displays a histogram in addition to an exposure bar. This allows the photographer to determine if the exposure is correct. The camera, however, is 'dumb' and always determines the mid-gray value as correct. Therefore, white walls will always appear mid-gray without correction, as will solid black areas. In such cases, you would change the metering method on the camera or apply exposure compensation.
Fortunately, on a smartphone, we see the result immediately, as a Live View mode is always active. This gives us the advantage of being able to assess and correct the image at any time.
In the Camera app, this is done by tapping to focus and then swiping up or down.
All external applications can do this as well, but often here you can set the focus point and the exposure point separately with two fingers.
Quality / Storage Format
In the very first menu item on standard cameras, you will find the 'Quality' setting. Here, the photographer sets whether they want to shoot in RAW or JPG (with various quality levels). RAW+JPG is also an option, of course.
Something similar exists on iOS. Normally, images are saved as JPG. This format is 8-bit, and the images are not as large. Since the iPhone 6s, shooting in RAW format has also been possible. For example, in this case, images are saved by Lightroom as DNG files. With iOS11, the HEIC format is also added.
I found a helpful article that explains the advantages and disadvantages, mainly for Windows users:
Transferring Photos
Normally, you connect the camera, and a dialog box appears.
With iOS, it's a bit different and can be confusing for new users at first. You can either upload the images via iTunes, where a backup can also be created immediately, or you can install an app.
I've been using PhotoSync for several years, a small app that sends photos directly to a computer via Wi-Fi. The app is quick to set up and works very well.
Android certainly has an advantage here, as files can be accessed directly via USB. Alternatively, you could also save data directly to a USB stick. Most users who have had their smartphone for some time have likely found their own preferred method.
Getting Started with Camera App Settings
The Camera app is pre-installed on iOS, and similar apps are likely available on your smartphone. The introduction has already described the major differences compared to "real" cameras, so now we can test your smartphone's capabilities.
Before we start on the iPhone, we should go to Settings -> Camera and activate the following:
Grid (displays a grid - rule of thirds)
Formats (High Efficiency - HEIC Format) or, for Windows users, Maximum Compatibility (JPG Format)
Auto-HDR – enable (otherwise HDR will not be available in the Camera app)
In the settings, you will also find all other apps and their settings/permissions. If an option isn't displayed, check here first.
Conclusion
The mobile phone is inferior to a proper DSLR in almost all respects. However, we always have it with us, which often makes it the preferred choice. During my tests, I meticulously note all advantages and disadvantages:
+ compact
+ always at hand
+ easy to use
+ live view with gesture control
+ built-in editing software
+ functions expandable via apps
- no aperture settings possible
- no long shutter speeds (only via third-party apps)
- high image noise
- no optical zoom
- no interchangeable lenses (only add-on lenses)
- poor flash performance
Smartphones are ideal for photography in well-lit conditions, or where you can work with manual settings and a tripod. Furthermore, a smartphone has become indispensable as it is a central means of communication, and the best possible images are not always required. Often, a nice selfie, a documentation photo, the ability to control other cameras with it, and much more, are sufficient.
Stabilization
As a photographer, you will always need a tripod if the shutter speed is longer than the focal length x crop factor x 2. For example, 55mm x 1.6 crop x 2 = 1/176 (approx. 1/200). A stabilizer can reduce the required shutter speed by another 2/3, but that's the extent of its capability.
iOS is designed so that you can take any shot handheld, which is possible because all lenses are hardware-stabilized. Small movements are compensated for in real-time. Since 1/3 second is the longest shutter speed and the stabilizer is then used, this is certainly plausible. In practice, however, this is certainly pushing the limits. Even longer exposures can still be achieved by taking multiple shots and layering them with software. This naturally results in a crop, but it is possible.
Apple has therefore decided to enable every non-photographer to take photos. This approach did not prioritize true photographers; consequently, third-party manufacturers fill this niche as far as technically possible.
Tripods
If you plan to photograph several people in a selfie, you should have a selfie stick with a remote shutter. Ideally, this can also be used as a tripod. This allows you to create long exposures, focus stacking, panoramas, product photos, etc.
For smartphones, a tripod always consists of several components:
- foldable legs
- extendable center column
- ball head
- smartphone clamp
- Bluetooth shutter button
Small tripods are sufficient, as the weight is not too great. Nevertheless, you should always prevent your phone from falling and use an additional protective case.
Panorama Tripods / Nodal Point Adapters
If you want perfect panoramas, you won't create them using the camera app's panorama function, but rather by manually photographing individual images.
For panoramas, the camera lens must rotate around its own axis; otherwise, parallax errors will occur. These are errors in stitching that arise when individual images don't align perfectly.
Panoramas without foreground objects can certainly be captured freehand.
However, as soon as you have very close objects or want to create spherical panoramas for virtual tours, you should delve into the topic of nodal points.
For the course, I'm bringing a walaptor.de nodal point adapter, which does its job well. It's not small, but the results are excellent. There isn't a wide range of options in the smartphone sector for this, as you can also use 360° cameras in such cases.
Connecting a 360° Camera
Today, 360° cameras are also suitable for spherical panoramas and live broadcasts. This is a very elegant and quick-to-implement technology. Using the Tetha S, I will demonstrate how to integrate an external camera via Wi-Fi and then use it from your smartphone.
The procedure is always the same for GoPro etc., providing insight into how interconnected smartphones have become.
Gimbals for Videos
If you enjoy filming, you can do so handheld or from a tripod. However, if you want to walk, run, etc., you should additionally stabilize the camera. Two options are available:
1. Gimbal with Camera + Smartphone
A stabilized camera, like those used in drones, plus a handle, your phone mounted, and you're ready for top-quality results. The advantage of an external camera is a larger sensor/lens. This results in better footage.
2. Gimbal + Smartphone as Camera
Also shake-free with all the technical capabilities of your smartphone.